Sunday 26 April 2015

Pop, Poppity, Pop

I love those lessons that just...work. There's no real reason why but everything about them is balanced and fun.
This year I took over Literacy planning for my team. Although this is a big task, it's not as bad as it sounds. We do not re-create the wheel each year, but re-use last year's lessons and edit as we feel we need to. As such, my job is pretty easy. I just add in some flare here and there (usually thanks to Pinterest inspiration).
However I find that I am often torn between the creative craftivities that I see all over the US-based teaching blogs (and love so much) and my UK-based training. I want my lessons to be interactive, creative, tactile and fun, but this doesn't always produce a lot of concrete evidence in my student's workbooks. In the long run, this poses a problem when our workbooks are being scrutinized and there is not work for each day written down. Of course, I could photograph, print, cut, glue in and mark each activity that we do but that just. isn't. practical. To sum up, it's hard to strike a balance between what I want to do and what I have to do.
My little ones' learning is the most important part and here is a summary of a lesson that I think worked for everyone.
The Literacy unit we were studying was Playscripts. This lesson worked because it was a script about a popcorn salesman. The main Learning Objective was to read and understand a script (which children would eventually be writing on their own) and to also use their 5 senses to describe (in this case, popcorn).
Firstly, we read the Reader's Theatre script "Pop, Poppity, Pop" off of the Super Teacher website. You need a subscription to view and download all of the worksheets off of this website, and I highly recommend it. After that, we did a word shower (one of my favourite activities) using all of our senses. I got them started then sent them off to finish their own in their Literacy books. To help them along,  I handed out plastic cups full of popcorn so they could sniff, taste, feel and see the stuff. (As I'm writing this, I am realizing that I could also have microwaved it with them and we could have discussed the sound it made. Again, all of these fabulous things are not always possible to do.) Students then completed the comprehension questions on Pop, Poppity, Pop. All in all, I think this was a fun lesson that took a simple comprehension text and made it tactile and fun!

Tuesday 21 April 2015

Rewards in 3L

Each year that I teach, I try out different reward systems. I've found that the best ones are the simplest ones. With too many systems you can end up tripping over yourself to keep them straight and they start to lose their meaning. When I taught in England I started using the behaviour chart that you see all over Pinterest and I really loved it. Of course, the one I created needed some serious amendments (each tiny, laminated name attached with sticky tac and often got lost), but it worked really well. When I moved to Bermuda, I packed away each of my handmade pieces but was soon introduced to Rick Morris: Creator of New Management. If nothing else, this sturdy chart will last up to lots of wear and tear. 
Check out my awesome Time Timer (purchased from Amazon) and my punctuation popcorn from here.
Good behaviour= clip up
Poor behaviour= clip down

You can see here that the kids' pegs have tallies on them. Students clip up until they are 'on top of the chart', then they clip off the chart. We chant "He/She's OFF THE CHAAAAARRRRTTTT!!!" and celebrate their achievement. These students will get a tally on their peg. Once students in my class get 5 tallies, they get to choose from my reward catalogue. "Fluffy Friend" and "Best Seat in Town" are two of the most popular prizes. I LOVE my reward catalogue because, once I've made it, I never have to think about it again! There is no running-to-the-dollar-store-to-top-up-my-treasure-chest business. This is not a school-wide thing, but I highly recommend it to everyone. You can also see a green peg with a butterfly on it. This is rewarded to students who get clipped off the chart 10 times. a HUGE achievement in our school. Once they are off the chart, the child or the teacher get to wear the peg on their shirt.

Another special reward I give in my class is these little postcards. I ordered them a long time ago from Vistaprint and paid next to nothing for them. For the last few years, I sent them out randomly throughout the year when I felt that a child deserved it. However, this year they ended up buried at the bottom of my desk drawer and I totally forgot about them. I just dug them up and have decided to send out an entire class set in one go. We send out 'Welcome' postcards in August and they are always a huge hit. Aren't they so cute!? What I love most about my reward systems are that they are pretty self-sufficient. I don't have to worry about staying on top of things or doing a certain something each week (because I always forget).
Good luck tackling all that tricky behaviour in your classes and remember...YOU TOTALLY ROCK!


Sunday 29 March 2015

Spring in the Classroom

Spring is in the air here in Bermuda and we had a great last week of term! Being that this was Parent-Teacher Conference week and we are in meetings until late into the night each day, we try to incorporate some activities that require little-to-no marking. One way we've done this is to do "Spring Handwriting" booklets. We googled and printed off a series of short poems to do with spring and Easter and I made some cute writing paper. The learning objective was for students to practice their handwriting. Once this activity is planned, it's completely child-run and is a great 'fast finisher' activity. More able writers were encouraged to try writing some of their own poems, too. On the last day of term, I stapled their booklets together with a cute title page and sent them home-- no marking needed! (and a cute keepsake for parents).

An annual spring activity in my class

I came across this little beauty last year on Pinterest. It's from the Teaching in Spain blog. I keep it very simple but you could extend the activity by encouraging patterning in the coloured stripes or discussing colour theory. One painting trick that I've picked up over the years is to use one paintbrush per paint colour. So, if I gave each table a paint tray with 6 colours in it, then they would also get 6 brushes. One would be used for purple, one for pink, and so on. That brush would never need to be washed or cleaned and dipped into another colour. This is a game changer.
After the kiddies have done their painting, I do some guided drawing to create the rabbit faces. They turn out so cute and really show off my students' different personalities. I should really do these two weeks before the holidays so I can keep them on display longer!


Each spring my school does egg rolling which is a really nice tradition. However, each year I have tried different painting techniques and never quite liked how they turned out. The key is to do something simple but effective. I don't really have much interest in giving my 21 students food colouring that could ruin their uniforms or any opportunity to drop hardboiled eggs on the floor. Well, this year they turned out really cute! All I did was put some scrap paper in a tray and get the kids to put in a few drops of paint. They then rolled the eggs around until they were covered. While they were doing this, I cut up paper and made little egg stands. We left them overnight to dry and the marbleized effect was super-cute the next day. I will definitely use this technique again. It was almost mess-free and was easy to manage. This was a really cool idea, but I just was not prepared at all!

Check out all of my other "Spring in the Classroom" ideas on Pinterest, here. 

Monday 16 March 2015

Face on Coins App and Helen Keller


We love studying all about Helen Keller in our Year 3 (Grade 2) classroom. A few years ago I created a new lesson on this amazing woman (inspired by this website). HK is on the Alabama state quarter because she is an inspirational person. I asked my students to think about someone who inspired them and to talk about it at home with their parents. We get all kinds of responses-- Benjamin Franklin, Barrack Obama, Michael Jackson, Queen Elizabeth, Katy Perry. Once they had their ideas, they would write a short paragraph about why they chose that person. The last thing they would do was draw their person into an outline of a quarter. Well, all those ideas went pear-shaped when we discovered this free app called Face on Coins. I have no idea why such an app would exist, except that it fits our lesson perfectly! It takes the lesson to a whole new level. Even better? It's free! Even more better? It's easy to use! All students need to do is find a picture of their inspirational person and load it into the app. They can choose their own coin colour and shape and add in a brief description. My kids absolutely loved it and even went home and made more! What a great way to get your students thinking about who has done amazing things and who we can all learn from.
Here's an example of one of my student's Face on Coins. 

Saturday 7 March 2015

Vocabulary, Connectives, Openers and Punctuation (VCOP)

Our school follows the UK curriculum so using VCOP is a big part of our Literacy program. It's broken into four parts: vocabulary, connectives, openers and punctuation. It's progressive so young children can access it and it encourages getting to 'the next level' as well. This makes differentiation super simple.

It's easy to have all 4 components available from the beginning of the school year (on display, for instance) but you can focus on one at a time in your word-level work. It can then be incorporated into your lesson's success criteria.

Lots of websites provide great resources so it is easy to incorporate VCOP into your classroom decor and make high-quality resources available at your student's fingertips. I really like the VCOP pyramids. Once put together and laminated, they can be set out on tables during independent writing time and referred to during guided writing.

The top of the pyramid is the most basic. Students move down the pyramid for a challenge. Teachers could add to the "Vocabulary" section so the words reflect what is being discussed in class. 


These are some of my favourite. Click on the images to visit the site's VCOP resources.


Wednesday 4 March 2015

Non-Negotiables

How is the school year already over half way over? Well... this makes my heart skip a beat because some of my littles are still struggling with remembering to use capitals, full stops (periods) and spelling of high frequency words.
One way we tackle this issue is to use Non-Negotiables. A few years ago my school was visited by some teachers from the UK and they showed us how to continuously remind children of these basics without having to repeat ourselves over and over. It's as simple as having your year level's Non-Negotiables decided upon at the beginning of the year. Each year's NNs will differ. Introduce these to the kids in September and have them on display.
NNs for a Year 3 class (2nd Grade)

What's great about these is you can refer to them simply as "Don't forget your Non-Negotiables" and this automatically reminds children of a whole list of expectations that the they are familiar with. I also like to introduce this to parents at Meet the Teacher Night. This is double-y helpful because, 1: it gives parents an idea of your most basic expectations, and 2: when you reference Non-Negotiables on homework or report cards, they know what you mean.
Year 3s Non-Negotiables:
- Underline the date with a ruler
-Write the date on each page. The day of the week and month need capitals.
-Write the learning objective at the top of the page.
-Write your name on all of your work. Make sure it begins with a capital.
-Put capital letters at the start of every sentence.
-Put a finger space between each word. 
-Put punctuation at the end of every sentence.
-When "I" is on its own, it is a capital.
Here is an example of how my teacher feedback is quick and easy with the help of NNs.

Tuesday 24 February 2015

Kahoot? Kahoot!

We have been using Kahoot in the classroom and absolutely love it! Do you Kahoot? Click here to learn more about this awesome site. 

All you need to do is create a free account and follow the instructions to make a multiple choice quiz that your students can answer on their own devices. The best part is that students can log into the quiz really easily (a great advantage if you are working with little ones since they can be really slow). From a web browser, they type in "Kahoot.it". You, the teacher, logs into your Kahoot account and display the quiz number. Students then type in the quiz number, create a user name and join the quiz. You display the question on your interactive whiteboard and the children's iPads show them four option buttons. They click on their answer and once everyone has entered a choice, the correct answer is revealed.
This is what students see on their iPad screens.

You can also put a time limit on each question. The best part of this experience was taking my S3 students (Grade 2) up to S6 (Grade 5) to teach them how to Kahoot! It was a great experience and a real boost for the little ones.

We've used Kahoot to review telling time questions and parts of speech. It really gets kids excited, even if the topic isn't something that normally gets their motors running. It's great as a plenary-type activity and also as an introductory activity to see what they already know.


Saturday 14 February 2015

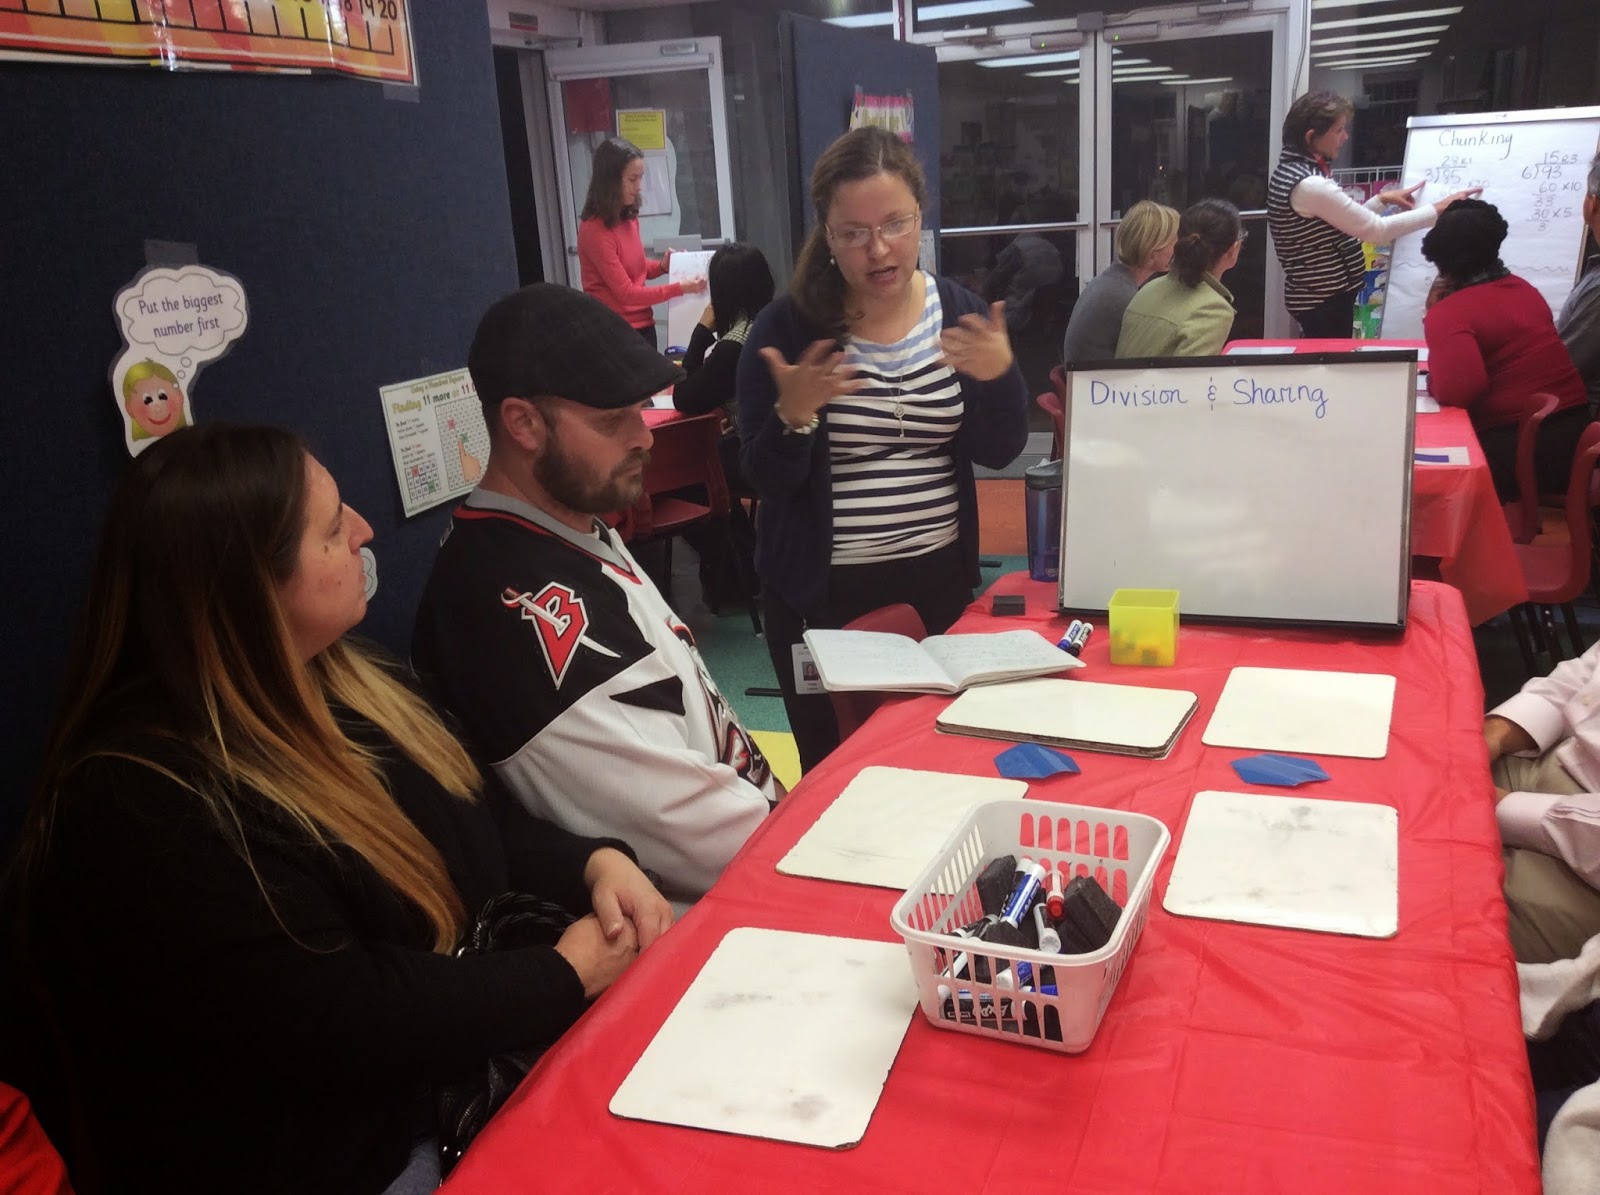
Upper Primary Numeracy Evening

As a way to reach out to students, my department decided to host a Numeracy Evening for parents of our students. Each teacher in the department (S3 and S4 in one area, S5 and S6 in another) taught a math concept that we thought the parents would benefit from learning too. I know it was tricky to learn all of the methods that we teach nowadays, so I'm sure some parents are really confused by their kids homework. Here are some of the stations we taught in S3 and S4:
Ms. Levere: division with sharing
Mrs. L: chunking method
Miss P: the grid method
Miss T: partitioning
Mrs. A: adding and subtracting on a number line
Mrs. D: different ways to use a 100 chart


Mrs. D used one of our favourite online resources that we use a lot in the first few weeks of school. Check it out here: Splat Square.

Although there weren't many parents in attendance, they were all really pleased with the information they received.